Side Plank Variations
Welcome to the world of abs workouts. You may not be glad you’re here right now, but I promise you will be. Working out the core muscles is essential for your workout regimen. A strong core stabilizes your body, which allows you to move in any direction and it helps you maintain your balance.
Contents
One of the best abs workouts that you can do is a plank. Chances are that you’ve heard of a plank before. But just to enlighten you a bit more, a plank is an isometric abdominal exercise that builds your core strength. During a traditional plank, you will maintain a push-up position, elbows directly under the shoulders, forearms facing forward and navel drawing in towards the spine. It’s not too complicated and you can modify it for all fitness levels.
If you’re a big fan of planks, then I have good news for you! There are multiple ways to do them. In fact, there are several side plank variations that you can add to your workout regimen. And if you’re a fan of the regular plank, then you’ll love the challenge of a side plank variation. Below we cover 10 of the best side plank variations.
Kneeling Side Plank

First up is the kneeling side plank. If you’re just getting started with your fitness journey or are nursing an injury, the kneeling side plank is the perfect variation to start with. Here’s how you do it:
- Lie on one side with your knees bent.
- Put your elbow directly under your shoulder and press your forearm into the floor.
- Press up into a side plank with only the thighs and hips leaving the floor.
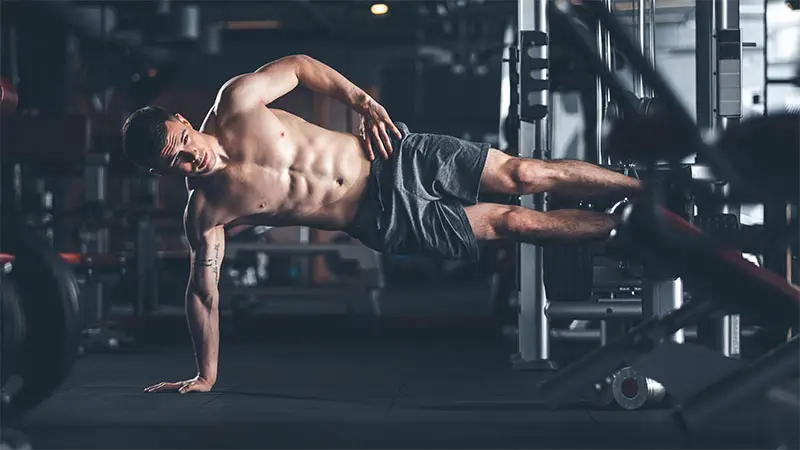
Side Plank
Now it’s time for the traditional side plank. In order to do a basic side plank you’ll need to:
- Lie on one side and straighten your legs.
- Position your hand directly under your shoulder and press into the floor.
- Lift the hips and squeeze your glutes.
- Pull the belly button in towards your spine and hold the position for 30 seconds.
- Switch sides.
Side Plank Reach
If you’re really wanting to challenge your balance and stability, this side plank variation will do just the trick. Side plank reaches will work the abs, lats, glutes, shoulders and obliques. Here’s how to do it:
- Get in a side plank position and reach your top arm up towards the ceiling.
- Wrap your top arm around your body like you are giving yourself a hug and thread the arm through the space under your plank until your shoulder is almost parallel to the floor.
- Pull your arm back up and return to the starting position. Complete 8 to 10 reps.
- Switch sides.
Alternating Side Plank
Are you ready to work the shoulders, triceps, core and obliques? It’s time to try an alternating side plank variation. You can perform this side plank variation on your hands or the forearms. Here’s how:
- Start in a normal plank position and stack your shoulders and elbows.
- Press your right hand into the floor and press into a side plank.
- Go from the right side plank back to a standard plank, then rotate to a left side plank.
- Do 2 or 3 sets of 8 to 10 reps.
Side Plank Knee to Elbow
This is one side plank variation that I have a love hate relationship with. While I love the burn and the way it works my core muscles, it definitely challenges me. But no worries, it’s an enjoyable challenge! Here’s how to do a side plank knee to elbow:
- Start in a side plank position — make sure that you stack your shoulder and wrists.
- Reach your top arm toward your head.
- Keep the hips high, pull your elbow down and pull the top knee to meet your elbow.
- Return to the side plank.
- Complete 5 to 6 reps and switch sides.
Elevated Side Plank
Now it’s time to take things to another level – both figuratively and literally. You’ll feel this exercise deep throughout your core muscles and will definitely enjoy the challenge during the elevated side plank. Here’s how to perform this side plank variation:
- Get into the side plank position.
- Put your feet onto an elevated surface such as a bench, box or chair.
- Raise your hips so that your body forms a straight line from the top of the head to your feet.
- Hold the elevated plank for 30 to 45 seconds.
- Switch sides.
Side Plank Leg Raise
Another great side plank variation is the side plank leg raise. This exercise will work your shoulders, obliques, hip abductors and glutes. Here’s how to do it:
- Start in a side plank position.
- Place your top hand on the hip or lift it up toward the ceiling.
- Keep the core engaged and lift your top leg higher than hip height.
- Lower the leg back down to starting position and complete 6 to 8 reps.
- Switch sides.
Side Plank Hip Lift
This is one of my all-time favorite side plank variations. I love how you can feel your obliques and core working to their potential during hip lifts. Here’s how to do them:
- Start in a side plank position.
- Keeping the hip stacked, lower the hips 2 to 4 inches down towards the floor.
- Lift the hips up 4 to 6 inches then lower back down.
- Complete 10 to 12 reps.
- Switch sides.
Weighted Side Plank Hip Lift
Meet the side plank hip lift’s bigger, older sister – weighted side plank hip lift. You can probably guess what the difference is between these two… weights! Here’s how to do it:
- Start in the side plank position and place a weight in your hand and rest it on your hip.
- Keeping the hip stacked, lower the hips 2 to 4 inches down towards the floor.
- Lift the hips up 4 to 6 inches then lower back down.
- Complete 10 to 12 reps.
- Switch sides.
Bosu Ball Side Plank
Last but not least is the bosu ball side plank variation. When you add the usage of a bosu or medicine ball to a workout, then you’re almost guaranteed a harder version of an exercise. So, if you’re REALLY ready to work your core, here’s how to do it:
- Get into a side plank position and rest your forearm on the bosu ball.
- Move your top leg forward instead of stacking the legs in order to have more stability.
- Place your top hand on your hip and lift them to the ceiling.
- Hold the position for 30 to 45 seconds.
- Switch sides.